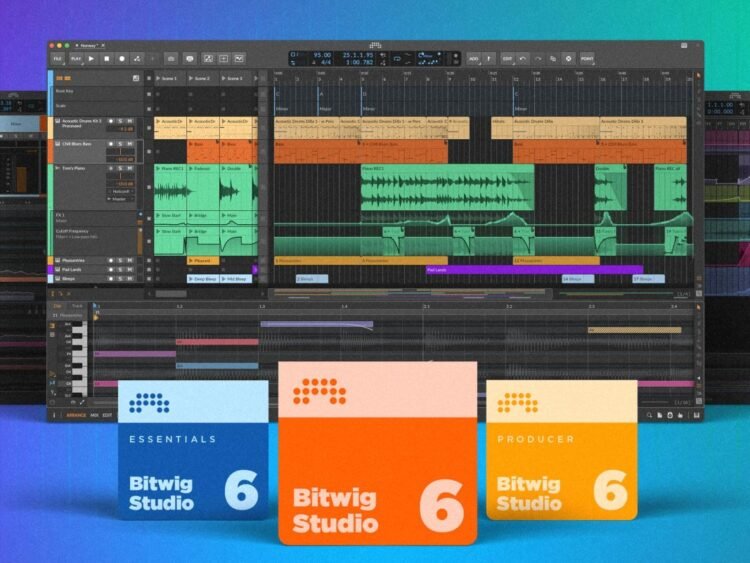
As somebody who cut their teeth on Cubase, Pro Tools, and other conventional DAWs, what struck me most the first time I used Bitwig Studio – and still does every time – is how much it feels like an elaborate instrument in its own right. Any sense of working in an emulation of a traditional studio takes a backseat in favour of a much more integrated and fluid creative environment.
But version 5 was released over two years ago, ample time for things to start feeling a bit same-y, and for minor irritations to become more irksome as one continually bounces up against them. Thankfully, the wait is now over and the all-new Bitwig Studio 6 has landed, replete with some very cool new tools and across-the-board streamlining – let’s see what’s new.
Interface updates in Bitwig 6
To start with, there are some obligatory user interface tweaks. Bitwig’s attractive colour scheme of muted dark grey screen furniture with vibrantly coloured controls and objects remains, but the Arrange window background is now also a dark grey (which looks nicer), and grid lines are now shown on top of clips. Also, the info readout panel has been centralised on the program window title bar, which makes more sense than having it pushed to the left as it was previously.
There are loads of other little visual tweaks, but my favourite is the addition of an ever-present palette for selecting the various cursor tools – pointer, time selection, pencil, etc. This is much better than having to rely on context-sensitive right-click menus (although memorising keyboard shortcuts has always been an option). Furthermore, there are two new cursor tools to play with: Spray Can and Audition.

The Spray Can tool’s main function is to create rows of notes at the current beat interval when working within the Edit view; it can also be used to quickly create new looping regions on note and audio tracks, and for drawing held automation points (see below) on automation lanes.
The Audition tool is even more useful. Clicking with it on any clip solos that clip and plays it back from the clicked point, which is far more immediate than having to first solo a track in order to hear it in isolation.
Automation improvements
Bitwig’s system of assignable modulators is one of the slickest in any DAW, but its track and clip automation tools have tended to leave a bit more to be desired. Recognising this, Bitwig have poured a lot of attention into this area in Bitwig Studio 6.
The segments between automation points can now be curved rather than be just straight lines. This means that drawing automation with the pencil tool results in a more accurate representation of the shape you drew using fewer points, resulting in automation data that’s much easier to work with. Moreover, bringing the mouse pointer close to a segment now highlights that segment so that it can be dragged up and down as a whole (better than editing individual points), or have its curvature adjusted.
Something new here that I really like is that it’s now possible to move the position of automation points without being blocked by other points. That is, if you drag an automation point past another point, then that point is removed, where previously it would have acted as a barrier preventing you from dragging beyond it. It’s a small thing, but very handy!
Automation points have also gained Spread and Hold parameters. The former introduces a randomisation within a specified Spread percentage range, whilst the latter causes a point’s value to be held until the next automation point is reached (these are what can be painted on automation lanes using the new Spray Can tool).
Without a doubt, the most exciting new automation feature is Automation Clips. These allow automation data to be worked with in exactly the same way as Note and Audio clips, and to exist independently of any related Note or Audio clip, whether used in the Clip Launcher or Arranger timeline. Automation Clips can be moved to different lanes and tracks, can be saved to the library for later re-use, and can even be dragged to devices in place of standard MSEG (Multi Stage Envelope Generator) curves. Very nice!
Clip Aliases
Back in the dim and distant past, before the days of the all-in-one DAW, MIDI sequencing software often had the ability to duplicate a part/clip as an alias rather than as an entirely new and independent part/clip. This was done as a means of saving on memory usage back when 4MB was considered a large amount of system RAM, but was phased out once we all started working on computers packed with gigabytes of memory.
Aliases were, however, exceptionally useful compositional tools irrespective of memory saving, because any changes made to a part/clip would also apply to any aliases of that part/clip. So I’m stoked to see Bitwig adding Clip Aliases to Bitwig Studio 6!
Any Audio, Note or Automation clip can have aliases created from it, and these aliases can be used in the regular Arranger timeline or in the Clip Launcher. And if you want to make changes to a specific instance of a Clip Alias, then it’s dead easy to convert it back into a standard unique clip.
The method of creating Clip Aliases is a little lumpy and feels like it still needs some streamlining, but it’s a welcome addition nonetheless.
…And there’s more
Given Bitwig’s focus on contemporary music styles, it is perhaps surprising that its Note Clips and tracks don’t offer a step input mode. Not so Bitwig 6, so you can now happily create crazy basslines and arpeggios without having to develop virtuoso keyboard skills. The feature is still somewhat basic, only allowing the creation of new notes and being unable to re-pitch existing notes, but it’s /step/ in the right direction (sorry – couldn’t resist the obvious pun).
The last big new feature I want to highlight is that projects can now have a global key signature assigned to them. This is picked up by any devices that generate or work with notes, such as Arpeggiator or the new Key Filter+ device. And whilst the key signature is project-wide, it can be changed using automation and/or modulators if needed.
More helpfully, the project-wide key signature can be used in the Note editor, highlighting the note lanes that match the current key and marking any notes that are outside of that key. A Snap to Key feature ensures that any notes entered with the Pencil or Spray Can tools are forced to the nearest in-key note, although, sadly, the new Step Input feature doesn’t interact with the project’s key signature, and changing the project key doesn’t automatically re-pitch your Note Clips. There is however, a Quantise To Key command that will re-pitch any out-of-key notes.
We’ll be digging deeper into all of these new features and putting them to the test in some real-world scenarios for our upcoming full review of Bitwig Studio 6. For now, though, it’s clear that Bitwig has delivered a raft of significant and well-judged upgrades to its eponymous DAW. It’s been a long wait, but based on what I’ve seen so far, it’s been worth it!
Our full review of Bitwig Studio 6 will come soon. Read more music tech news.
Get the MusicTech newsletter
Get the latest news, reviews and tutorials to your inbox.


